This tutorial provides an overview of the tools available in Photoshop to remove unwanted objects, people and distractions from your photos. You can use one of them to remove an object, or use a combination of them (which of course, gives provides more control and refinement):
the Spot Healing Brush
the Content-Aware Fill
the Clone Stamp Tool
The Spot Healing Brush

Click here to download the sample image below to follow along.
How it works:
You paint over an object that you want to remove, Photoshop will then use its automated technology to remove that object and replace it with colours and textures taken from the surrounding areas instead.
Useful for:
Where the areas surrounding the object you want to remove have mostly even and subtle textures, because it is easy for Photoshop to analyse and sample the surrounding areas. For example, the sandy beaches of Seychelles in our sample image.
Step-by-step instructions:
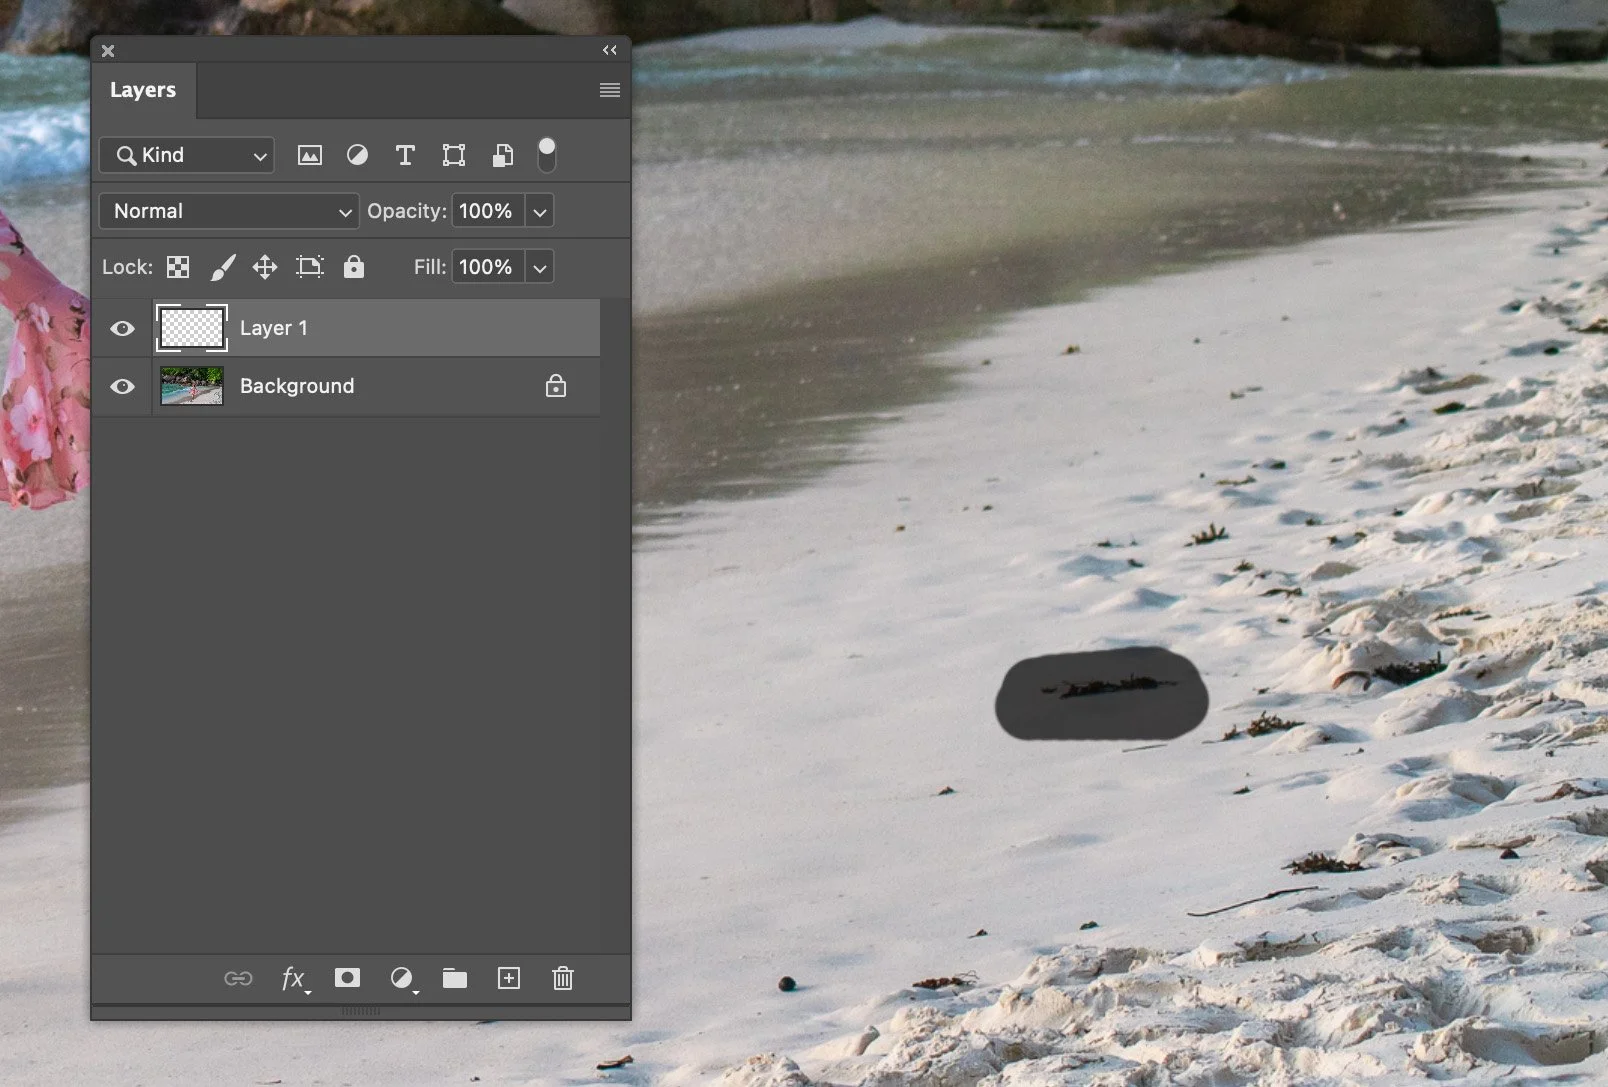
1. Create a new layer so that you are not making destructive changes to the original photo - click the ‘Plus’ box in the Layers window:


2. Select the Spot Healing Brush Tool (keyboard shortcut: J). Then set the Sample option to ‘Current & Below’:

3. Then simply paint over any objects or areas you want to hide and Photoshop will do its magic. You can increase or decrease the paint brush size with the number slider, or using the keyboard shortcut of [ to decrease size and ] to increase size:

After:
Before:


4. Repeat this process until all the unwanted elements in the images have been removed. The results:
Before:
After:


Content-Aware Fill
How it works:
You draw a selection over an area of objects that you want to remove, Photoshop will then use its automated technology to remove that object and replace it with colours and textures taken from the surrounding areas instead. This is the exact same thing as the Spot Healing tool discussed above, with two differences:
How you select the object that you wish to replace: the Spot Healing tool uses a paint brush, to allow you more fine control over the object you wish to make disappear; in contrast, for Content-Aware, you make a selection with the lasso tool to tell Photoshop to replace everything within that selection. Give it a try and you will quickly see which you prefer to use for what kind of circumstances.
With Content-Aware, you can tell Photoshop which specific surrounding areas to reference (to ‘sample’), whereas Spot Healing does not enable this.
Useful for:
When you have a plain or a simple background and there is something you want to remove and be replaced simply with the rest of the background. For example, on the sandy beach in the below photo, I want some of the twigs to be removed and replaced with the same white sand that dominates the image.

Step-by-step instructions:
1. Select the Lasso Tool (keyboard shortcut: L) and make a selection around the thing you want to remove:


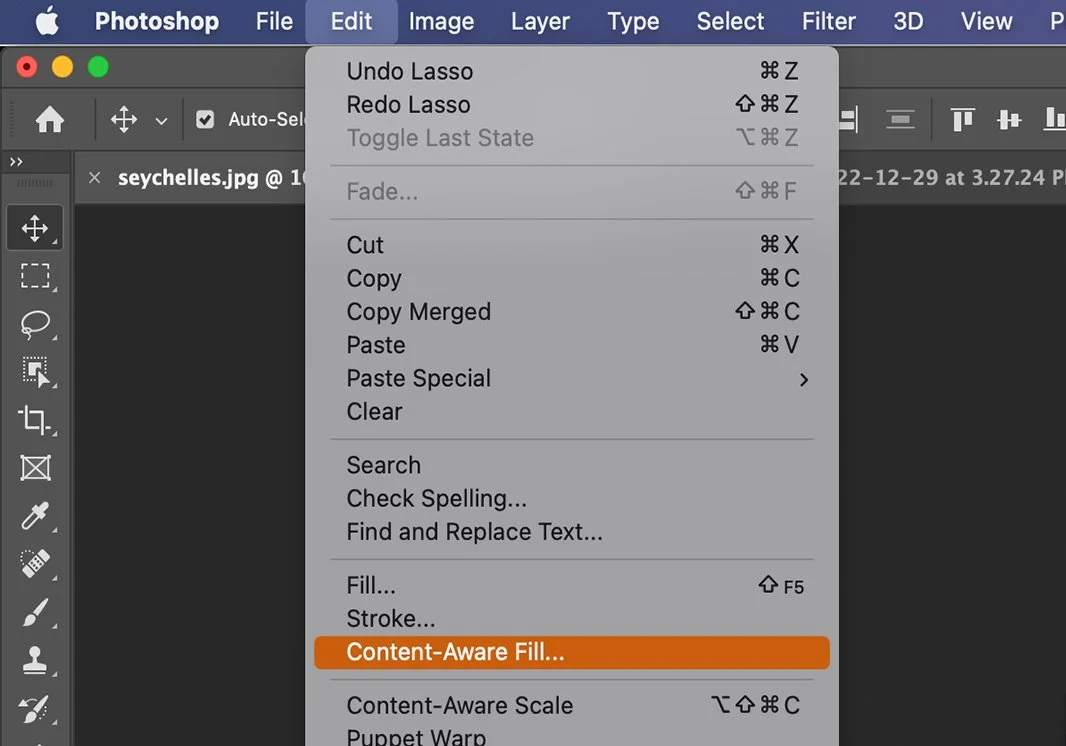
2. Click the Edit menu and select Content-Aware Fill, this will open the Content-Aware Fill dialogue:

3. Optional step: adjust the area you want Photoshop to sample.
This tool uses Adobe’s automation technology to analyse the areas surrounding your selected area (highlighted in green). So the green highlighted area is an area you want Photoshop to look to as a reference point, to fill in the area you want to replace. In the Options panel on the top left, you can select the add button (+) to brush over the areas of the image you want Photoshop to sample, or select the subtract button (-) to brush over the areas of the image you want Photoshop not to sample. As you adjust the green highlighted area, you can see the corresponding changes to the image in the Preview window.
You can see in my image below that I subtracted the messy areas in the green highlighted ‘sampled area’, telling Photoshop that I don’t want it to sample from those areas and I only want Photoshop to sample from the plain white sand area.


4. Click ‘OK’.

After:
Before:


The Clone Stamp Tool
Let’s use this image as an example:

How it works:
Clone Stamp allows you to ‘sample’ an area as a reference then replicate an exact copy of it in another area. The replication is precise (in contrast to Content-Aware and Spot Healing, which only replace an object with surrounding colours and textures without precision). This means, we can make an object disappear by covering it up with replications of another pattern to extend that pattern to the area where the object is - like the white fence in the above image.
Useful for:
The removal of an area containing sharp lines, edges, patterns and textures (in contrast to a subtle, plain area such as a sandy beach). For example, on the left side of the fence there is a warning sign - if I want to make this sign disappear and replace it with the white fence, then using the Content-Aware fill or the Spot-Healing tool will not work because those automation tools cannot properly analyse the complexities of the fence to execute lines we want with precision.
Step-by-step instructions:
1. Duplicate the original image - click the Layers menu and select Duplicate Layer (Keyboard shortcut: Control or Command + J). This way, if you make mistakes, then the original image can be recovered.


2. Select the Clone Stamp Tool from the toolbar (keyboard shortcut: S).
3. Click the ALT or Option key, you will see your mouse cursor turning into a circle. Then while holding the ALT or Option key, click on the sampled information area - this is the area you are indicating to Photoshop you wish to replicate:


4. Adjust the brush size (keyboard shortcut: [ and ]) so that the replicated fence lines are proportionate to the existing fence, then simply paint over the unwanted object.


5. Use Spot Healing to clean up
Of course, you can also use the other Photoshop tools to clean up the area. For example, you can see there are too many dots on the fence - since the fence has a white, relatively smooth texture, it is the perfect job for the Spot Healing tool. Using the method discussed above on this page, run Spot Healing over the dots on the fence and other little distractions to make them disappear.
After cleaning up:
Before cleaning up:


Using a combination of Spot Healing and Clone Stamp, the result is below:
Before:
After:


Below is another example that you commonly encounter - you take a photo of your subject but someone else is walking into the picture and you want to remove them. Since there are complicated lines and symmetries in the green fence and the pavement in this picture, we know that Content-Aware will not work. As such, I used the Clone Stamp tool to do most of the work.

Just like with the white fence on the beach image above, I select the Clone Stamp Tool (keyboard shortcut: S), click and hold down the ALT or Option key to sample the area I want to replicate (the green fence, pavement lines, etc.) then paint the same over the lady who is walking, so make her ‘disappear’:


I then used the Spot Healing tool to clean up any imperfections. Below is the result!
After:
Before:


Now that you have mastered the basics, you can use one or a combination of the tools demonstrated in this tutorial to remove any object in an image!